Installing new countertops is a significant home improvement project that can dramatically enhance the look and functionality of your kitchen or bathroom. At Chippewa Stone, we strive to make the installation process as smooth and stress-free as possible for our customers. This comprehensive guide will walk you through what to expect during a countertop installation, from the initial consultation to the final touches, ensuring you’re fully prepared for every step of the journey.
Initial Consultation and Selection
- The Consultation: Your countertop installation journey begins with an initial consultation at Chippewa Stone. During this meeting, you’ll discuss your project details, preferences, and budget with one of our knowledgeable sales associates. This is a crucial step where you can share your vision and get expert advice on the best materials, colors, and finishes for your countertops.
- Material Selection: Selecting the right material is key to achieving the desired look and durability for your countertops. During your consultation, you’ll have the opportunity to view samples and discuss the pros and cons of each material, helping you make an informed decision. At Chippewa Stone, we offer a wide range of materials, including:
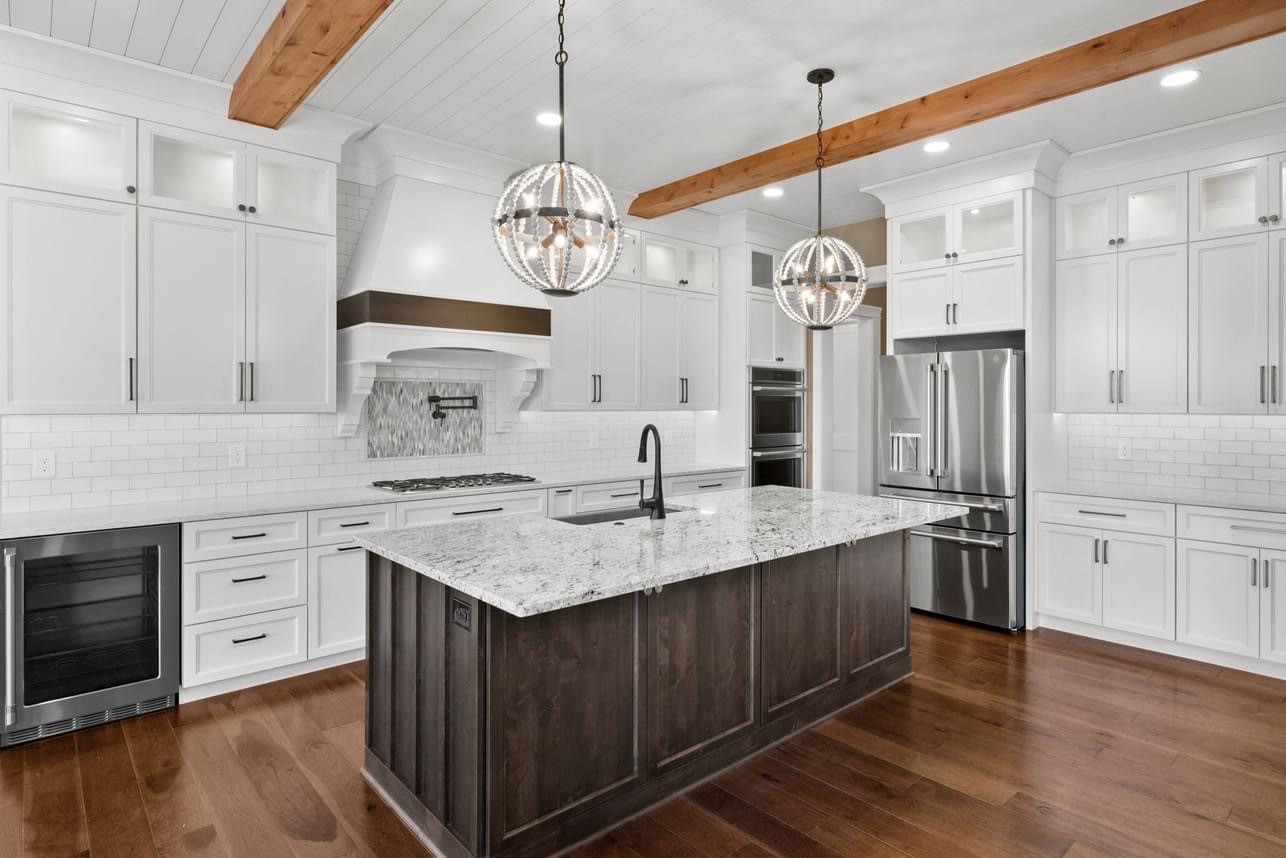
- Granite: Known for its durability and unique patterns, granite is a popular choice for kitchen countertops. It is heat resistant and is well suited for kitchens, bars, bathrooms, outdoors, fireplaces and showers.
- Quartzite: Acid, heat, scratch resistant, and harder than granite and glass. Quartzite requires extra dry time before installation to allow the water to evaporate before it can be sealed, extending our time frame between template & install.
- Marble: Ideal for those seeking a luxurious and elegant appearance, though it requires more maintenance than granite. Marble is a softer stone than granite and not as stain resistant.
- Dolomite: Similar in appearance to marble but is slightly more durable, making it a good option for countertops. Heat resistant and less absorbent to liquids, this stone is sought after for its chic look.
- Soapstone: A softer, natural stone that develops a patina over time, adding character to your space. Cooks love soapstone because it does not react to acids (lemon juice, tomato sauce and cocktail mixers).
- Quartz: Engineered for consistency and ease of maintenance, quartz offers a variety of colors, movements and textures, making this product appealing for those who are looking for more consistency. It is less heat-resistant, with a heat tolerance level of up to 300 degrees Fahrenheit vs. 1200 degrees Fahrenheit with natural stone.
- Measuring and Template Creation: Accurate measurements are essential for a perfect fit. Once you’ve selected your material, our team will schedule a visit to your home to take precise measurements. This step involves:
- Creating a Template: Using specialized tools, our team will create a template of your existing countertops or the area where the new countertops will be installed. This ensures that the new countertops will fit perfectly, accounting for any irregularities in the walls or cabinets.
- Discussing Details: Please have a decision maker on site. During this visit, you can discuss any specific requirements, such as cutouts for provided top mount sinks, cooktops and faucets, as well as your Island or Peninsula overhangs.
- New Cabinets: To ensure a good fit, base cabinets must be secured to the wall/each other and level. All panels, false fronts/corbels/island legs/cleating, must be installed prior to template arrival. Please refer to your sign off sheet for additional information.
Pre-Installation Preparation
- Removing the Old Countertops: Before your new countertops can be installed, the old ones need to be removed. Here’s what to expect:
- Professional Removal: Prior to finalizing your order, if you choose to have our team tear out & haul away your old countertops, they will complete this on the day of installation. If you prefer to do it yourself, make sure to follow proper safety procedures to avoid damaging the cabinets or walls.
- Disconnecting Appliances: Any appliances connected to the countertops, such as sinks, faucets and cooktops, will need to be disconnected. You may need to arrange for a plumber or electrician for certain tasks if you are unable to disconnect on your own.
- Preparing the Area: Proper preparation of the installation area is crucial for a smooth process. This includes:
- Clearing the Area: Ensure that the drawers are removed and the area around the countertops is clear of personal items, appliances, and any obstructions.
- Protecting Surrounding Areas: Our team will take steps to protect your cabinets, floors, and walls from damage during the installation process. Please refer to your sign off sheet for additional information.
- Delivery of Countertops: Your new countertops will be fabricated based on the templates created during the measuring visit. Once fabrication is complete, the countertops will be delivered to your home. This step involves:
- Scheduling Arrival for Installation: Our team will coordinate with you to schedule a convenient arrival window.
- Inspecting the Countertops: Upon arrival, our team will inspect the countertops to ensure they meet our quality standards and match the specifications discussed during your consultation.
Installation Day
- Arrival and Setup: On the day of installation, our team will arrive between the scheduled arrival window and begin setting up. This process includes:
- Unloading the Countertops: Carefully unloading the countertops from the delivery vehicle and bringing them into your home. It is essential to have a clear path for our team to avoid injuries.
- Setting Up Tools and Equipment: Setting up the necessary tools and equipment for the installation, including saws, drills, and adhesives. Every install is unique and may require adjustments to the countertops and on-site fabrication.
- Placing the Countertops: Once everything is set up, the actual installation begins. Here’s what to expect:
- Dry Fitting: Before securing the countertops, our team will do a dry fit to ensure they align perfectly with the template and your cabinets. This step allows for any last-minute adjustments.
- Securing the Countertops: Once the fit is confirmed, the countertops will be secured in place using specialized adhesives and brackets. This process ensures a stable and durable installation.
- Sealing Seams: If your countertops have seams, our team will expertly seal them to ensure a seamless appearance. This involves using color-matched epoxy to blend the seams with the rest of the countertop. Please refer to your sign off sheet for additional information.
- Installing Cutouts and Fixtures: With the countertops in place, our team will move on to installing any undermount sinks and drilling holes for faucets, and misc. items such as:
- Sink and Faucet Cutouts: Cutting the openings for sinks (top mount sinks only), and drilling holes for faucets, ensuring a precise fit.
- Appliance and Outlet Cutouts: Cutting the openings for your cooktop, and outlets, if applicable. Please have your cooktop on site.
- Final Adjustments and Cleanup: Once the countertops and sink(s) are installed, our team will make any final adjustments and clean up the area. This includes:
- Final Inspection: Conducting a thorough inspection to ensure everything is installed correctly and meets our quality standards.
- Cleaning the Area: Cleaning up any debris and ensuring your kitchen or bathroom is left in a clean and tidy state.
- Sealing the Countertops: If required, our team will apply a 15-year sealant to protect the countertops and enhance their longevity.
Post-Installation Care and Maintenance
- Allowing the Countertops to Settle: After installation, it’s important to allow the countertops to settle and the adhesives to cure properly. This may take a few hours to a full day, depending on the materials and adhesives used.
- Cleaning and Sealing: Proper cleaning and sealing are essential for maintaining the beauty and durability of your new countertops. Here are some tips:
- Cleaning: Use a mild soap and water solution or a cleaner specifically designed for your countertop material. Avoid harsh chemicals or abrasive cleaners that can damage the surface.
- Sealing: Depending on the material, your countertops may need to be sealed periodically. Granite and marble, for example, typically require sealing to help prevent stains and moisture. Our team will provide you with specific recommendations based on the material you’ve chosen and apply a 15-year sealant, if necessary.
- Maintenance Tips: To keep your countertops looking their best, follow these maintenance tips:
- Avoid Heat Damage: Use trivets or hot pads under hot pots and pans to prevent heat damage.
- Prevent Scratches: Use cutting boards when preparing food to avoid scratching the surface and dulling your knives.
- Wipe Spills Promptly: Clean up spills immediately to prevent staining, especially for materials like marble that are more porous.
- Please refer to your sign off sheet for additional information.
What to Expect from Chippewa Stone’s Service
- Professionalism and Expertise: At Chippewa Stone, we pride ourselves on our professionalism and expertise. Our team is highly trained and experienced in all aspects of countertop installation, ensuring a flawless result every time.
- Customer Support: From the initial consultation to post-installation care, we provide comprehensive customer support. If you have any questions or concerns at any stage of the process, our team is always available to assist you.
- Quality Assurance: Quality is our top priority at Chippewa Stone. We use only the highest quality materials and the latest installation techniques to ensure your countertops are not only beautiful but also durable and long-lasting.
The Benefits of Choosing Chippewa Stone
- Wide Selection of Materials: We offer an extensive range of countertop materials, ensuring you’ll find the perfect match for your style and needs. Whether you prefer the natural beauty of granite or the sleek look of quartz, we have something for everyone.
- Customized Solutions: Every home is unique, and we believe your countertops should be too. Our team will work with you to create customized solutions that perfectly fit your space and design preferences.
- Competitive Pricing: We understand that a home improvement project is a significant investment. That’s why we offer competitive pricing and transparent cost estimates, ensuring you get the best value for your money.
- Exceptional Craftsmanship: Our skilled craftsmen take pride in their work, delivering exceptional results that exceed your expectations. From precise measurements to flawless installations, we ensure every detail is perfect.
In conclusion, installing new countertops is a significant project that can greatly enhance the beauty and functionality of your home. At Chippewa Stone, we’re committed to providing a seamless and enjoyable experience from start to finish. By understanding what to expect during the countertop installation process, you can prepare for each step and ensure a successful outcome.
From the initial consultation and material selection to the installation day and post-installation care, our team is here to guide you every step of the way. With our expertise, high-quality materials, and commitment to customer satisfaction, you can trust Chippewa Stone to deliver exceptional results that will elevate your space.

